OSM Multi-tenancy
This is an experimental feature which allows to use a single instance of OSM for a set of different projects and users. Full support will be available in Release FOUR.
The required steps are:
- Enable PAM authentication at SO, to support multiple users.
- Create the required users and projects in SO, assigning the required privileges.
- Map each SO project with a new RO tenant, with its corresponding VIMs.
- Map each SO project with the existing config-agent, or create a separate Juju controllers for each SO project.
Prerequisites
Since all the existing data will be cleared from SO as part of enabling PAM authentication, be sure to:
1. Backup any relevant descriptors.
2. Delete any existing instances.
3. Retrieve the current config-agent password, using the OSM client:
osm config-agent list
Enabling PAM authentication
PAM can use a local user database, as well as external ones, like for example LDAP. This example covers the interaction with a local user database only.
1. Edit /usr/rift/etc/default/launchpad, replacing "--start-auth-svc" for "--start-pam-svc"
...
# set this to any options you want passed to launchpad.py
LP_OPTS=" --start-pam-svc "
...
2. Clear the existing SO configuration, please note that this will delete all the data (descriptors, accounts, instances, etc.)
rm -rf /usr/rift/var/rift
3. Restart the service
systemctl stop launchpad
systemctl start launchpad
4. Create the local user database inside the SO container
adduser user_a
...
adduser user_b
...
Managing SO Projects and Users
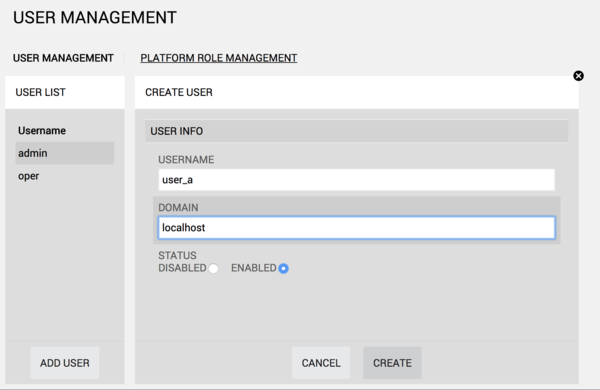
1. From the UI, go to Administration --> User Management, and clic on Add User. Fill the form with the name of the users created at the previous stage, making sure to specify 'localhost' in the 'DOMAIN' field.
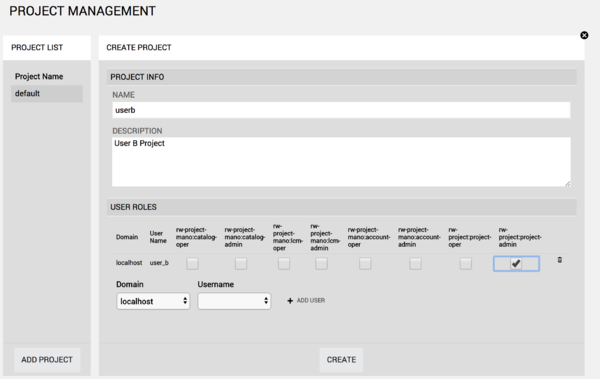
2. Next, go to Administration --> Project Management, and clic on Add Project.
Put a name, an optional description, and add users to it (from the 'localhost' domain) using the dropdown below.
For each user, specify a role. If the user needs all privileges over this project only, the role 'rw-project:project-admin' should suffice.
At this point, you can already login to the UI using the new users' credentials, the project's name will appear at the upper right corner.
Managing RO Tenants
1. Go to the RO container and create a new tenant. Take note of the tenant ID.
openmano tenant-create tenant_a
2. If a datacenter needs to be added at any point, be sure to do it from RO, by setting the tenant as an evironment variable first.
export OPENMANO_TENANT=tenant_a
openmano datacenter-create ...
openmano datacenter-attach ...
An example on how to create datacenters/VIMs from RO, can be found at the following links:
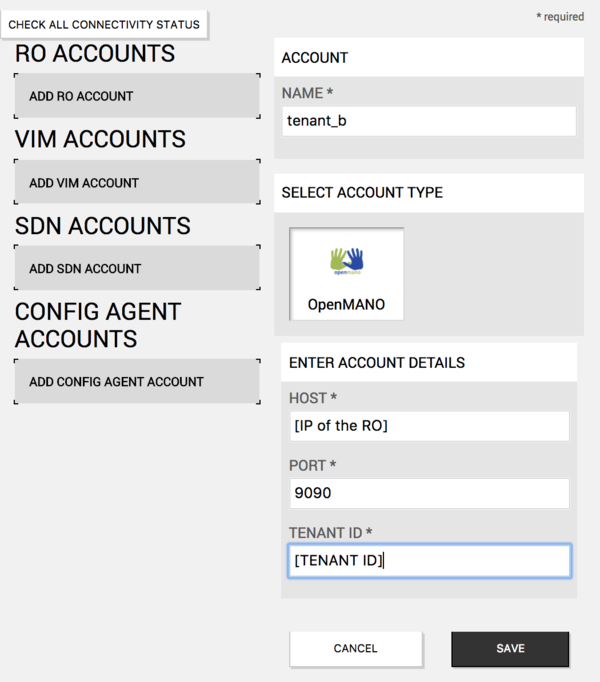
3. Go to the UI with the new user, and from the 'Accounts' tab, create and configure the new RO tenant.
At this point, new NS/VNFs can be instantiated from this tenant.
Associating new SO Projects to VCA
In simple scenarios, a single Juju controller instance can be shared by multiple SO Projects.
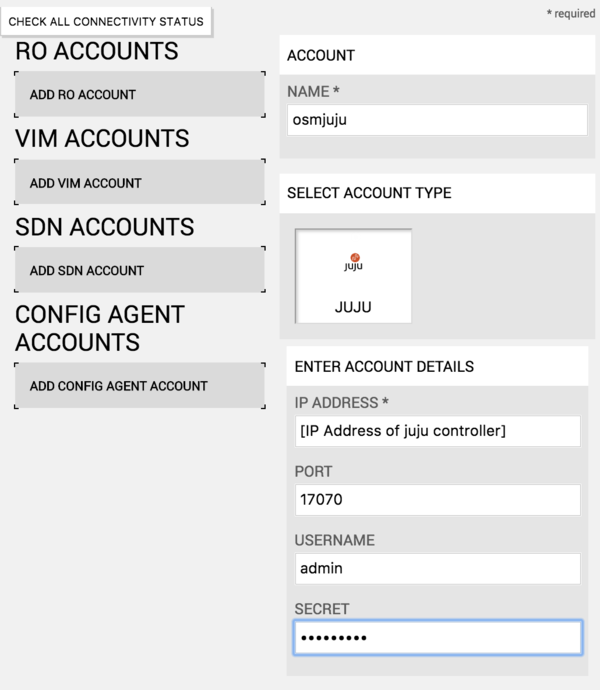
Using the Juju config-agent credentials obtained before (as specified in the prerequisites section), create a new 'Config Agent' Account to associate the existing Juju controller.
The Juju controller IP address can be obtained by accesing VCA container and listing the LXC containers (machine name ending in '0' (zero) is the juju controller)
root@VCA:~# lxc list
Working with multiple Juju controllers
If a separate juju config-agent is required for new SO projects, a new juju controller needs to be bootstrapped inside VCA. For example:
juju bootstrap localhost juju_controller_2 \
--config default-series=xenial \
--config enable-os-refresh-update=false \
--config enable-os-upgrade=false \
--config apt-http-proxy=http://10.44.127.1:8000
Then, the password would need to be set:
juju change-user-password -c juju_controller_2 admin
If using an OSM environment based on LXC containers, a new static route needs to be added at the host to reach the nested container. For example:
sudo route add -host 10.44.127.19 gw 10.243.159.174
# remember to persist the route, usually done by editing the /etc/rc.local file.
Finally, from VCA, list the controllers, take note of the new IP address, and create a new config-agent account with this information from the UI.
To select the controller over commands are being executed, add the '-c' flag with the new controller's name, for example:
juju status -c juju_controller_2


