Talk:Deploying advanced Network Services (Release THREE)
Ping pong Network Service
In this example we will deploy the following Network Service, consisting of a Ping VNF and a Pong VNF connected by two VLDs.
Before going on, download the required VNF and NS packages from this URL: https://osm-download.etsi.org/ftp/examples/ping_pong_ns/
Uploading VNF images to the VIM
Get the Ping and Pong images from the following link: http://repo.riftio.com/releases/open.riftio.com/4.3.1/riftware-vnf-images.zip
Unzip the file an get the images
unzip riftware-vnf-images.zip
tar xzf ping_vnfd_with_image.tar.gz
tar xzf pong_vnfd_with_image.tar.gz
ls ping_vnfd_with_image/images/    -> Ping VNF image
ls pong_vnfd_with_image/images/    -> Pong VNF image
Then, onboard the image into the VIM. The instruction differs from one VIM to another:
- In Openstack:
openstack image create --file="./Fedora-x86_64-20-20131211.1-sda-ping.qcow2" --container-format=bare --disk-format=qcow2 Fedora-x86_64-20-20131211.1-sda-ping.qcow2
openstack image create --file="./Fedora-x86_64-20-20131211.1-sda-pong.qcow2" --container-format=bare --disk-format=qcow2 Fedora-x86_64-20-20131211.1-sda-pong.qcow2
- In openvim:
#copy the images to the NFS shared folder (e.g. /mnt/openvim-nfs)
cp ./Fedora-x86_64-20-20131211.1-sda-ping.qcow2 /mnt/openvim-nfs/
cp ./Fedora-x86_64-20-20131211.1-sda-pong.qcow2 /mnt/openvim-nfs/
openvim image-create --name Fedora-x86_64-20-20131211.1-sda-ping.qcow2 --path /mnt/openvim-nfs/Fedora-x86_64-20-20131211.1-sda-ping.qcow2
openvim image-create --name Fedora-x86_64-20-20131211.1-sda-pong.qcow2 --path /mnt/openvim-nfs/Fedora-x86_64-20-20131211.1-sda-pong.qcow2
Onboarding a VNF
- From the UI:
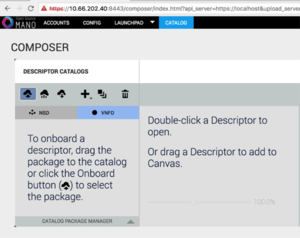
- Go to Catalog
- Click on the import button, then VNFD
- Drag and drop the VNF package files ping_vnf.tar.gz and pong_vnf.tar.gz in the importing area.
- From the SO CLI:
- From the SO-ub container ("lxc exec SO-ub bash"), execute the following:
/root/SO/rwlaunchpad/plugins/rwlaunchpadtasklet/scripts/onboard_pkg -s 127.0.0.1 -u ping_vnf.tar.gz -u pong_vnf.tar.gz
Onboarding a NS
- From the UI:
- Go to Catalog
- Click on the import button, then NSD
- Drag and drop the NS package file ping_pong_ns.tar.gz in the importing area.
- From the SO CLI:
- From the SO-ub container ("lxc exec SO-ub bash"), execute the following command:
/root/SO/rwlaunchpad/plugins/rwlaunchpadtasklet/scripts/onboard_pkg -s 127.0.0.1 -u ping_pong_ns.tar.gz
Instantiating the NS
- From the UI:
- Go to Launchpad > Instantiate
- Select the NS descriptor to be instantiated, and click on Next
- Add a name to the NS instance, and click on Launch.
- From the SO CLI:
- From the SO-ub container ("lxc exec SO-ub bash"), execute the following command:
/root/SO/rwlaunchpad/plugins/rwlaunchpadtasklet/scripts/onboard_pkg -i <ns-instance-name> -d <nsd-id> -D <data-center-id>
Wait for the message that the NS has been successfully deployed, and that's all!
Accessing CLI for viewing instantiated NS details
From the SO-ub container ("lxc exec SO-ub bash"), execute the following command to bring up SO CLI (username:admin password:admin)
/usr/rift/rift-shell -r -i /usr/rift -a /usr/rift/.artifacts -- rwcli
The CLI can be used to both configure the system and show operational-data from the system. For instance:
 rift# show nsd-catalog # show the nsd catalog
 rift# show vnfd-catalog # show vnfd catalog
 rift# show ns-instance-config nsr # Lists instantiated network service
 rift# show ns-instance-opdata nsr # Lists of instantiated network service op-data
