Release 0 HowTo guide for users
Introduction
OSM is a model-driven, ETSI compliant NFV MANO solution that simplifies deployment of VNFs and the composition and management of complex network services. It provides all the tools needed for automated end-to-end service delivery and lifecycle management.
Getting Started
The following steps need to be completed to get OSM installed, configured and running.
- Installation
- Accessing Launchpad
- Configuration
- Packages
- On-boarding
- Instantiation
- Service and Config Primitives
- Termination
Installation
OSM run time requires the installation of SO, RO and Configuration Manager. The instructions for installing the OSM components are described here.
Accessing Launchpad
Launchpad provides the user interface to the OSM orchestrator. From the Launchpad user can manage the catalog, compose the NS/VNF descriptors and perform the lifecycle management on Network Services. The launchpad UI can be accessed through URL https://a.b.c.d:8000 where a.b.c.d is the ip address of the VM where SO installed (Google chrome version 50 or later is recommended).
|
Note: Following ports need to be open for HTTP/HTTPS/ws/wss protocols and accessible from the machine where the web-browser is running to the machine where the Launchpad is running:
|
The default username/password for accessing launchpad is admin/admin
Configuration
Launchpad need to be configured with the details of the cloud account and configuration agent account before NS/VNF packages are on-boaded and network services are orchestrated. cloud accounts and configuration agent accounts can be configured from the launchpad UI.
To configure cloud account:
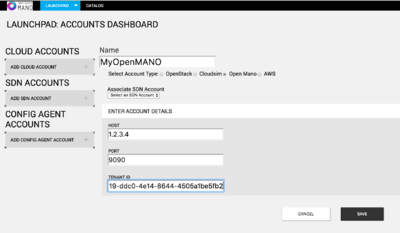
 Click on Launchpad and select accounts to navigate to the accounts configuration page.
 Click on ADD CLOUD ACCOUNT and fill the account details
 NAME: Enter the name of cloud account
 Select Account Type: choose  "Open MANO"
 Under ENTER ACCOUNT  DETAILS
    HOST: Enter the IP address of the VM where openmano is running
    PORT: Enter the port for openmano (Default port is 9090)
    TEANT ID: Enter the tenant id configured in openmano
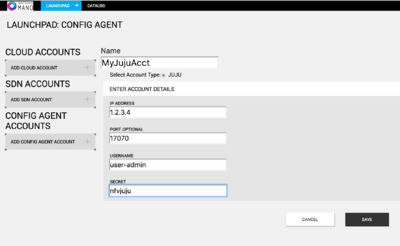
To configure config agent account:
 From  accounts configuration page,
  Click on ADD CONFIG AGENT ACCOUNT and fill account details
  IP ADDRESS: Address of the Juju server
  PORT: Enter the port where juju server is running(Default port is 17070)
  USERNAME: user name to access juju server
  SECRET:  password to access juju server
Packages
The on-boarding process accepts raw descriptors in yaml format or a package in gzipped tar format. The package format is described here.
About checksums.txt
All packages destined to be on-boarded to RIFT.ware require a checksums.txt file to verify the integrity of the archive's contents. The checksums.txt contains a list of the files in the package, as well as the SHA-256 encrypted hash of each file.
For example, assume a package you want to onboard looks like the following:
|-- checksums.txt | |-- images | \-- name1-image.iso | \-- vnfd
   |-- name1-vnfd.xml
   \-- name2-vnfd.xml
The checksums.txt file might resemble this:
93554f7808ac53a5116fd1e0f7bec1d15c7a652a59ee8c3f616aef871d592d3b vnfd/name1-vnfd.xml 471b8d9d68b47516c89adbdbfd30f5134012d306c0b64951a9555f966b2d3711 vnfd/name2-vnfd.xml a5d6da626667e21f7de04202c8da5396c0fc7e26872d016f3065f1110cff7962 images/name1-image.iso
Create a package using a script
The generate_descriptor_pkg.sh script generates a checksum.txt file and lets you create and onboard packages that RIFT.ware supports. The following command packages the descriptors and images if they adhere to the Launchpad package folder structure.
$RIFT_ROOT/bin/generate_descriptor_pkg.sh
Create a package manually
   Create a descriptor, supporting files, and checksums.txt file.
   Create a *.tar.gz archive of the files. For example:
   $ tar -zcvf package-name.tar.gz source-folder-name
   Copy the gzipped archive to a location accessible to RIFT.ware.
On-boarding
On-boarding is the process of submitting an existing VNF package or network service descriptor (NSD) to the Launchpad catalog. On-boarding allows objects in to the launchpad catalog so that they can be instantiated.
To on-board a VNF package follow the following steps,
- Click Catalog in Launchpad Dashboard.
- Click the icon to onboard a catalog package
- Navigate to the location of the first VNFD package.
- Optionally open operating system’s file manager utility, and drag and drop one or more packages directly onto the Catalog Package Manager.
- Wait for the package to complete uploading. This process could take several minutes, depending on the complexity of the VNFD.
- Repeat steps 4 and 5 until all the VNFs needed for the network service are on-boarded.
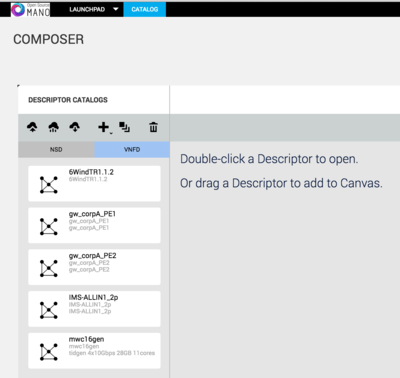
The following image shows the descriptor catalog with few on-boarded VNFDs.
A network service descriptor (NSD) is the deployment template that describes the network service and its constituent elements, such as virtual network functions, virtual links, and virtual network function forwarding graphs.
To on-board a nsd package follow the following steps,
- Below the Descriptor Catalogs label, click the NSD tab.
- Click the icon and onboard a catalog package using any of the following options:
- Optionally open your operating system’s file manager utility, and drag and drop one or more packages directly onto the Catalog Package Manager.
- Navigate to the location of the NSD package and click Open.
- Wait for the package to complete uploading.
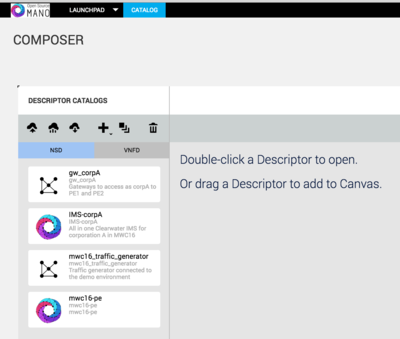
The process could take several minutes, depending on NSD complexity. When a NSD package has been fully on-boarded to the catalog, the new NSD appears in the Catalog Package Manager.
The following image shows the descriptor catalog with few on-boarded NSDs.
Instantiation
Instantiating an NS is as simple as browsing the catalog and specifying the required input parameters. The Launchpad also provides a detailed view of the underlying compute and network topologies.
To instantiate network service,
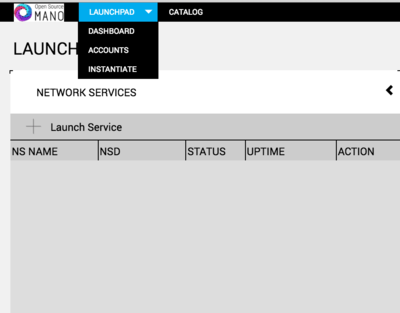
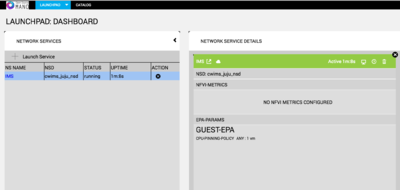
- On the Launchpad tab, choose Dashboard link.
- Click to select Instantiate.
- Enter the name of the service, the cloud account, datacenter and any input parameters and click on "Launch".
- The selected network service will get instantiated in the selected data center.
Service and Config Primitives
If the VNFs in the network service has charms specified in the descriptor, they will be deployed as proxy charms in juju once the network service is instantiated.
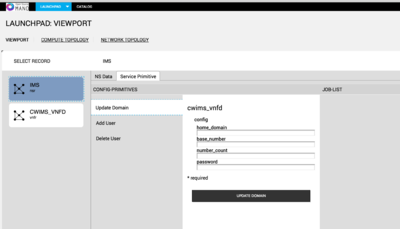
If the network service descriptor has any service primitives configured, they will be available in the viewport.
To access the view port page click on the ![]() link on the Running NS instance.
The service primitives if available will be shown on the viewport page.
Clicking on the VNFR will expose any conifg primitives available on the VNF.
link on the Running NS instance.
The service primitives if available will be shown on the viewport page.
Clicking on the VNFR will expose any conifg primitives available on the VNF.
The following image shows an example NS with service primitives,
Termination
To Terminate a running network service, click on the ![]() link on the running NS. The network service and the VNFs associated with the NS will be terminated.
All the resources allocated in the cloud will be released.
link on the running NS. The network service and the VNFs associated with the NS will be terminated.
All the resources allocated in the cloud will be released.
Your feedback is most welcome!
You can send us your comments and questions to OSM_TECH@list.etsi.org
Or join the OpenSourceMANO Slack Workplace
See hereafter some best practices to report issues on OSM
